Parsley

I love parsley! It’s probably my absolute favorite spice. I can take a leaf and just go and eat it. Parsley or leaf parsley doesn’t really matter to me. Parsley is very full and good, but can also become a little earthy and dirty in the “mug”. Leaf parsley, on the other hand, probably tastes a little less, but is clean and easy to take and eat right away. Last year we only grew leaf parsley and it turned out so amazingly nice. We have a lot in the freezer and ate so much this summer. Unfortunately, I think the parsley loses some of its flavor when stored. Regardless of whether I freeze or dry, there is a very big difference compared to eating it fresh. Boring in the winter, but it makes you want to grow and eat extra during the summer!

To sow

Parsley can advantageously be sown indoors as early as March, but it is also possible to sow it directly on the plant site in May. I do as I usually do and sow it in a trough. I don’t know if it’s the best or if it fits better in a plug tray but the best seed is the one that is sown so do what you feel suits you. Parsley sows about 0.5 cm deep. I’m not too particular about that sort of thing either… But if you want to do exactly that, I can recommend taking a flower stick and marking up 0.5 cm. Stick it in the soil and you have a nice little hole that is just the right depth. Last year we grew parsley in clusters and it worked very well so this year I sowed it in groups with several seeds together. Parsley is biennial, but the second year it likes to bloom, so if you don’t want to take your own seeds, it’s best to remove the inflorescence as early as possible. Then the parsley continues to produce leaves.

To grow

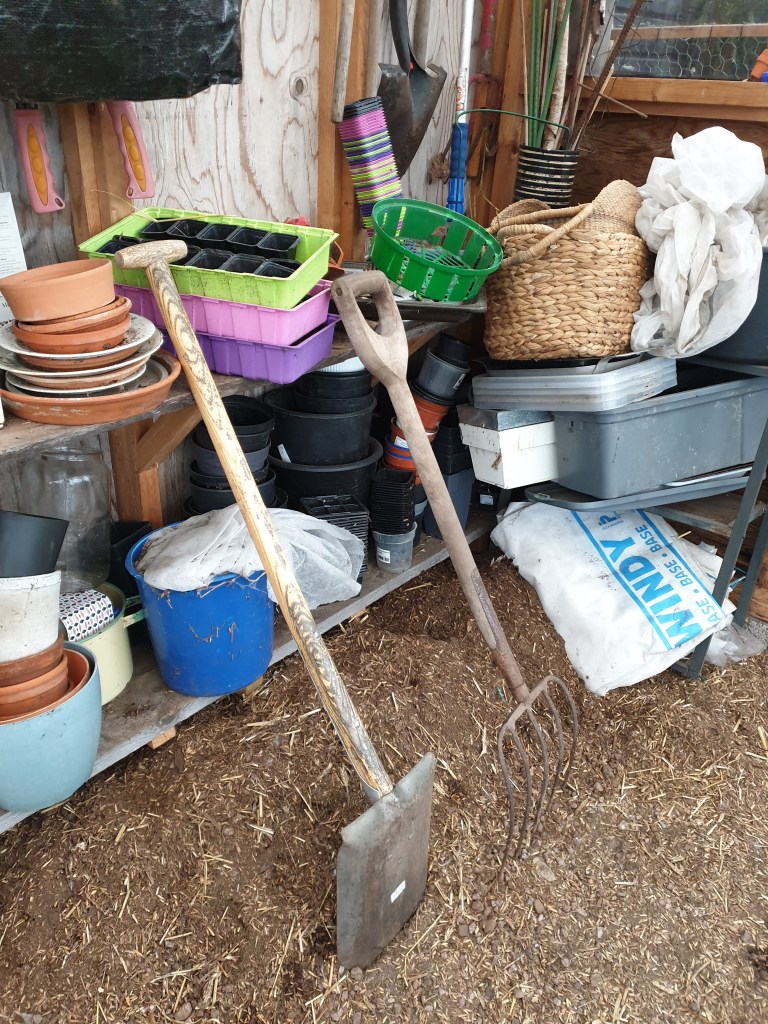
When the parsley comes up and you see that the roots are on their way to the bottom of the pot or tray, it is time to replant. If it’s warm enough, you can put it outside immediately, tempering if necessary. I guess I will repot mine and have them in the greenhouse a few weeks before planting in the garden. With all spices, I prefer to have them near the kitchen. Put them in a pot or a piece of land near the kitchen and it’s easy to go out and harvest when you need to.

To harvest

Parsley is harvested continuously during the season. The more you harvest, the more new leaves come. I prefer to harvest when I’m going to use the parsley because it quickly gets a bit boring after harvesting. Parsley leaves in particular quickly begin to droop and dry if left out. Parsley can stand in a glass of water for a few days. Make sure the plant has grown and feels strong before you harvest for the first time.

To store and refine

As I said, I have both dried and frozen parsley. Of those ways, I prefer freezing. I think it saves most of the flavor although it is nowhere near the fresh parsley. It is very good to mix parsley with garlic, salt, pepper, oil and some nuts, as a variation on pesto. The stem can be added to soup which is then mixed or you pick up the stems when the soup is ready.

Quick guide

  • Pre-cultivate in March, approx. 0.5 cm deep or sow directly on the cultivation site in May
  • Harvest when the plant is strong, the more you harvest the more will come
  • Use in all foods and freeze the excess

Growing in March and filming

The other day I planted all the seeds I had planned for March. What went into the ground were two kinds of tomatoes, leaf parsley, goose parsley, basil, lavender, giant verbena, snow love flowers and carrot. I have planted everything except the carrot indoors, the carrot ended up in the greenhouse. Carrots cannot be pre-cultivated. When it gets going, it sends a long root thread down into the ground and when it doesn’t go any further, it starts to grow on the width instead. This means that if you sow carrots in a tray indoors, they will only grow as long as the tray is deep.

I am so happy that there will be a lot of flowers this year. We haven’t invested much in it before, all the focus has been on edible crops. But the more I learn about biodiversity and the needs of the insects, my interest in flowers has also increased. There happened to be a lot of purple flowers. Nothing I thought of when I ordered, but it’s probably the color I like most in flowers.

I made an attempt to film when I was sowing but inexperienced as I am filming, it turned out to be a weird angle where my arm obscured a part of the seeds… How difficult can it be, one wonders, quite difficult it seems. Haha! There will be new attempts! The video of the sowing of the carrot turned out quite well, so possibly it will be up on youtube soon. I posted my first video in the form of a “short” on YouTube the other day. It’s a movie where I peel a black, dried, half-rotten cabbage and find a beautiful little head under all the bad leaves. If you haven’t seen it, check it out here: https://youtube.com/shorts/k3hsXv7yxd4?feature=share

Perhaps you have found similar treasures among your stored vegetables?

Leek

To sow

I sow leeks in a fairly large box, it depends on how much you want, of course. The seeds are covered with a layer of soil, about 1 cm. When the leeks start to look up, they are thin and fragile and are easier to handle in clusters. It took me three times to get the little shoots to survive. I have both dried them out and soaked them. So it’s not the crop I think is the easiest to grow. But last year we succeeded fantastically well and we are still harvesting leeks in the greenhouse. It looks like it will last until the next round comes up.

When the leek comes up and starts to split, you can cut it a little at the top. It’s great to have the cut on a salad, sandwich or in food and the leek becomes a little more stable and not so long and lanky.

To grow

I usually leave the leeks in the same box until it’s time to plant them in the garden, and that’s because they are so thin and delicate and easily break when handled. If the roots start to stick out from under the growing trough, you can place a dish with soil underneath so the roots can find their way further and not be exposed to the sun. When you put the leeks out in the garden, you divide them and plant them one by one. The leek can be advantageously cupped, then the white part will be longer. Like all onions, it wants a lot of nutrition.

To harvest

You can harvest the leeks as you need them. Just pull the leek out of the soil and it’s ready to use. It is also fine to continue topping the leek stem and thus let the plant continue to grow.

To store and refine

Before last year, we got few and thin leeks. Then we brought them all in, rinsed, sliced and dried them. Then we stored the dry leek in glass jars in the kitchen and used them in cooking. It tasted good but was somewhat chewy and needed to be fried or boiled to be good. Last year we got many large leeks. When winter began to approach, I replanted the leeks that were left in the greenhouse. I left some outside in the garden. We harvested the ones out in the garden first, but they had time to experience both snow and frost and coped well. The ones in the greenhouse are still standing and it feels absolutely fantastic to be able to go out and harvest fresh leeks in the middle of the coldest winter. I have seen others who did not replant the leeks into the soil but instead put a bunch in a bucket and covered the roots with soil. It is an easier and faster way than digging a hole for each onion and we will try that this year. It is also possible to leave the leeks in the garden all winter, but it is probably good to protect them with hay, planting fabric or the like. Support the planting fabric so that the snow does not weigh it down too much.

Quick guide

  • Sow indoors in January/February
  • Top the onion when it looks lanky
  • Plant out one by one when the risk of frost is over
  • Wants a lot of nutrition
  • Harvest as needed
  • Can remain in the garden over the winter if covered or put into a greenhouse

February

To do

Check if you have manure and soil. If you haven’t, contact farmers or horse people nearby to see if you can get or buy some manure in the spring. Keep in mind that you may need to change the soil in pots and grow boxes to prevent disease. It is especially important if you plant the same type of crop year after year.

Take care of your indoor plants. Change or top up the soil, replant in a bigger pot, divide your favorites so you get more for yourself or can give to a friend. Give them some nourishment and shower them so they feel fresh and nice. Extra lovely in gray/brown February (those are the dominant colors here anyway).

Have you ordered seeds? If not, do it! If you have ordered, they will probably arrive soon. Sort and read when and how different seeds should be sown. Feel free to write down which month you will sow different things or put the bags in different piles for different months. In any case, I think it helps to have a little order.

To sow

I will sow basil, lavender and giant verbena in February. If you are sowing onions from seed, it is also time to sow them. You can also sow different leafy vegetables in the greenhouse to get an early harvest of small green leaves. Maybe I’ll sow some spinach, we’ll see. It might start to feel a bit ratchet on fresh, locally grown stuff. Therefore it is absolutely perfect to sow a little sprouts too. Sprouts will be ready in a few days. Alpha-alpha sprouts are classics, but it is also possible to sprout both peas and lentils. Try it yourself and find your and your family’s favorites!

To eat

Look in the freezer and pantry for things you have left over from last year’s cultivations and gatherings of berries and mushrooms. Look in the store for food grown in your area. I find Swedish apples and cabbage, for example. Give yourself a little challenge and skip vegetables that are produced far away, even if you might usually buy them. Choose things that are grown in the immediate area, within the country or in your neighboring countries.

Summary lists

Do:

Check manure and soil

Take care of your potted plants indoors

Order and sort seeds

Sow:

Basil

Onion from seed

Lavender

Giant verbena

Leafy vegetables

Sprouts

Eat:

Look deep into the freezer and pantry

Look for locally grown food (incl. neighboring countries)

Own sprouts

Chili: The Fiery Flavor Booster – Growing, Harvesting, and Enjoying

Chili – the darling of flavor enthusiasts! This humble fruit packs a punch that has turned it into a culinary celebrity. Its fiery potency has caused quite a stir, with numerous daredevils competing to consume “the world’s hottest chili”. These bold endeavors do bring entertainment, showcasing the sheer power that a tiny fruit can hold. Personally, my preference leans towards a more moderate heat level – a chili that complements, not overpowers, the taste of the food. To understand the heat level of different chili varieties, the Scoville scale is a handy tool. The higher the Scoville rating, the hotter the chili.

Chili offers a spectrum of colors, shapes, heat levels, growth habits, and maturation rates. Always check the seed packet or product description when buying seeds to choose a variety that fits your taste and cultivation needs. In my experience, chilies are delightfully easy to grow, thriving in various locations – a balcony, a window, a greenhouse, or even on outdoor steps. Whether you’re starting from seeds or purchasing fully-grown plants, chilies are typically prolific fruit bearers, aesthetically pleasing, and simple to store. Even better, you can save seeds from your own plants or even from a store-bought chili for planting next year – a true garden gem!

Planting Your Chili Seeds

In Sweden, and other regions with short summers, chili seeds should be sown early in the season, typically between January to March, depending on the growing zone and local climate. Chili is a light germinator, meaning the seeds should lie on top of the soil rather than being buried. Just lightly press the seeds into the soil for good contact. Initially, I buried my seeds and while they did germinate, the results were less optimal, probably with lower germination rates. Keep the soil moist after sowing by covering it with plastic, but ensure air can enter by creating holes or leaving a small opening. Watering should be done from below or using a spray bottle.

Nurturing Your Chili Plants

Once the seedlings sprout, it’s time for transplantation. Move them into a slightly larger pot filled with nutrient-rich soil, planting them deep enough for stability. Plant lights help to cultivate robust, sturdy plants. I’ve grown chili both with and without plant lights; while both work, plants grown without lights tend to be more fragile. They stretch towards the scant sunlight from the window, growing longer but not thicker in the stem.

Keep an eye on the roots – when they begin to protrude from the drainage hole, it’s time for a bigger pot. Continue using nutrient-rich soil and supplement with fertilizer or compost tea. Chilies love a warm, wind-protected spot, making them perfect for outdoor pot cultivation during summer, or planting in the greenhouse or garden. Wait until frost risk has passed before moving plants outdoors permanently. Acclimatize them first by keeping them outside during the day and indoors at night for a few days. However, always keep a weather eye open for unexpected frosty nights.

Harvesting Your Chili

Harvesting chili is straightforward – simply pick the fruits once they’ve ripened to their expected color. I’ve found that regular harvesting encourages the plant to produce more fruits. Just like other plants, chili redirects energy towards producing new fruits once ripe ones are removed. It’s perfectly fine to pick chilies before they’re fully ripe and let them finish ripening in a window. You can even experiment by tasting chilies at different ripening stages – they might vary in heat levels!

Storing and Using Your Chili

There’s a smorgasbord of ways to use your harvested chilies – dry them, grind them, create sauces, use fresh, or freeze. You could even host a fun, if daring, contest of who can eat the hottest chili – though proceed at your own risk!

During summer, we mainly use fresh chilies in our meals, chopping them into soups, stews, omelets, pies, sauces – really, the possibilities are endless. It’s always a good idea to taste the chilies before adding large quantities into your dishes – the heat levels can be tricky to reduce once added. The seeds and the white pith are where most of the heat resides, so use those parts sparingly if you prefer a milder flavor. Any unused chilies from the summer are usually dried and later ground or chopped for use in meals, just like fresh ones.

When drying chilies, I thread them onto a string, passing a needle through the chili stem, and hang them in a window. Not only does this method effectively dry the chilies, but it also creates a charming display. Be sure to space the fruits apart to prevent mold.

A word of caution: always use gloves when handling fresh chilies, even the milder varieties. Accidental eye contact after handling chilies can be unbearably painful. Chili residue is stubborn and may remain on your hands even after washing.

Quick Guide

  • Sow seeds on top of soil between January – March
  • Transplant when needed, based on root growth
  • Ensure plants receive adequate nutrition
  • Chilies prefer sunny, warm, and wind-protected environments
  • Harvest when ripe
  • Use in all foods, dry, freeze, or create chili sauce

Chilies are a flavor adventure – embark on your journey today!

Plan for January

Half of January has already passed, time flies!

Now is the time to plan this year’s gardening. As you can read about in the post about seed ordering, I have a plan in a spreadsheet on Google Drive. In that document there is a list of what to sow, when to sow, whether to pre-cultivate inside, in a greenhouse or direct sow. I also have some lists about crop sequence, what is good to plant together and general development time to know when it is time to harden and plant out. But so far, there is not much in that list that is relevant.

Begin to sow

In January I have some seeds to plant. Some years I have planted lots in January. I have wanted an early harvest of everything but it doesn’t suit my growing style or location. The plants become far too large and rickety due to poor lighting. The entire kitchen table is flooded with pots of all sizes and I end up having to plant crops that aren’t really ready, that can’t really handle the cold out there. That’s different for everyone, but this year I will sow chili and leeks. I’m also going to try to plant some garlic because I didn’t last fall. However, it is a bit difficult to get hold of good chives at this time of year. The reason why chillies and leeks are sown is that they have a long development time. Other things that are also suitable for sowing in January are aubergine, celeriac and paprika. Of course, it is also possible to sow cabbage to pick small leaves, peas for pea shoots and other small sprouts that are good. It all depends on your time, your energy and your wishes and then the location of course! Next week I will publish a chili cultivation guide. There is all the information to get started with your chili cultivation + a quick guide for those of you who don’t like reading long instructions.

Check your gear

In January it is also a good time to check through pots and troughs and buy or order what you are missing. I reuse everything I can until it falls to pieces and I like to save on old plastic containers for food bought during the year. Important when it comes to the first seeds is that there is good drainage so that the soil can absorb water if you water from below and so water can flow out if you water from above. The small seeds are often sensitive to both drying out and flooding. For me, unfortunately, there will be a lot of plastic pots. I’ve tried cultivating in old milk cartons and in egg cartons but find that it easily molds or that the carton kind of dissolves. I hope to find some more durable material one day but for now it is as it is. I also usually start planning where to put things out in the garden to see if support sticks or netting is needed for the climbing beans, sugar snap peas and crops like that. Tools are also good to check. Right where it is, spring is here and then you don’t want to stand there without a grip or shovel and discover that there is a puncture on the wheelbarrow. It’s always busy as soon as spring comes, even if you forget it before each season.

Tidy up in the garden

I don’t know about you, but my garden is pretty ugly right now. Everything is weighed down by moisture and rain, it’s muddy on the ground and the colors are fairly dull. One of the few things that is nice is that our pond is full of water and that the ground around it is slightly drier than previous years when there was a flood. Another thing is that there is a lot coming out! What is hidden in grass and snow comes out in the thaw! Those rocks I moved from the duck house but just put in a pile waiting for more time are clearly visible now, calling out to me to be moved. The shovel that I didn’t find last summer when the grass was tall is there in full view now along with my daughter’s bucket, rake, ball and shovel. Also, everything that looks perfectly fine in the summer looks pretty awful now. For example, a broken bench that stands by the chicken coop and the two compost bins that look like they were thrown out at random. So it’s a good time to clean the garden!

Sometimes you find leek when tidying up!

Enjoy the winter

I love all seasons! It’s actually true! I used to say I loved summer and hated winter because I love heat but not cold. But now I enjoy all seasons. Spring is wonderful when little flowers surprise you here and there. The birds are chirping and there is a nice tension in the air. A promise and a longing for sun, warmth and life! Summer is warm, light, no heavy clothes, just going out. Many have holidays, it grows and is created everywhere. Tasty berries and vegetables are right outside your door, ready to be picked. And then comes autumn. Harvest time! To take care of everything that we worked so hard for all year. But also to be inside, take out a warm sweater, feel the smell of damp leaves when picking mushrooms in the forest. So one day when you look out the window, it’s here, winter, it’s snowing a little, the neighbor puts up lights in the window, Christmas lights, New Year’s rockets and promises of an even better year, next year. We get to put our fingers in the soil again and feel a slight scent of anticipation, hope for a good harvest, excitement about new plants. To be honest, I’m pretty tired of gardening in November and gladly take some time off to relax. But in January, my fingers start to itch a little and I can enjoy that itch for a while. Sit and dream in front of the fire with a cup of something hot to drink, it’s cold and windy outside, but I don’t have to go out, not now, now I can enjoy inside and tomorrow when it’s a beautiful winter sun, then I can go out in the greenhouse, get out some troughs and some soil and plant my very first seeds for this year. Beautiful, hot, red chilis!