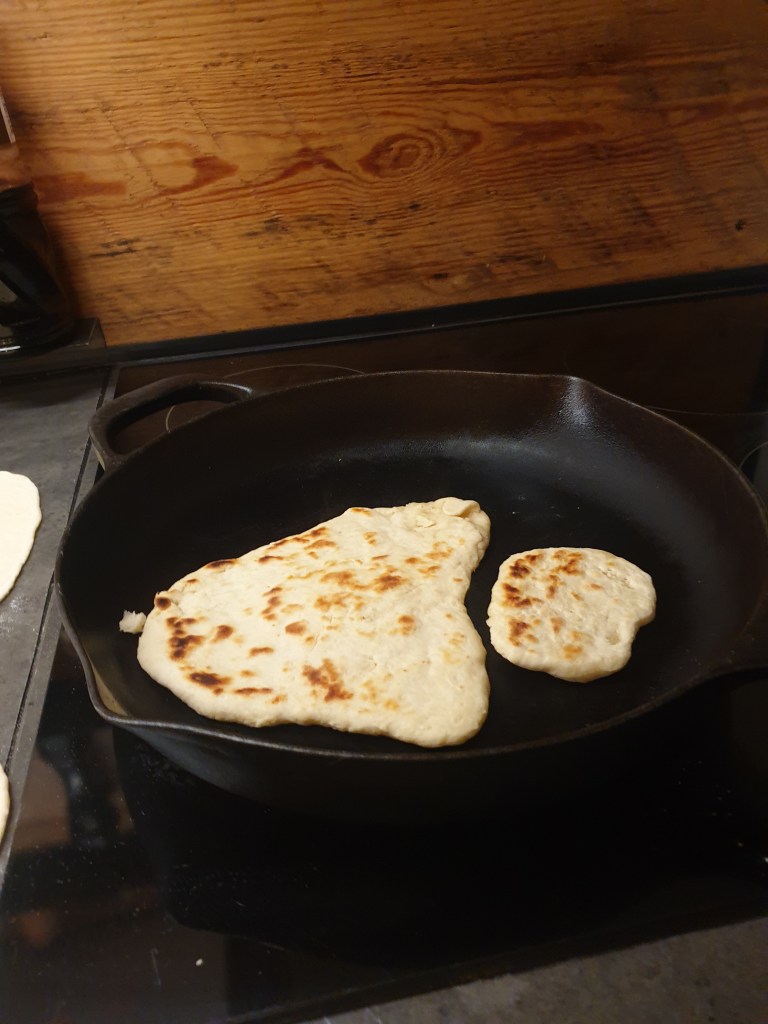
Oh no! The oven breaks two days before Christmas Eve and we don’t have time to arrange for a new one. Luckily, we can finish cooking at my parents’ house and a few days after Christmas we go to Austria for three weeks. When we get home we go shopping but I can’t bring myself to buy bread, it has become crazy expensive and it is both easy and delicious to make at home. Without an oven, however, the usual recipes do not work. Instead, we make fried bread and my daughter is happy to help! It’s extra fun to bake together!
This recipe is both simple and quick because it is baked on baking powder and therefore does not need to be leavened. It is also possible to vary in several different ways. Here is the basic recipe with some suggestions to spice up the bread a bit.
Frying pan bread
about 6 pcs 5 dl wheat flour (can be mixed with other types of flour to your taste) 2 teaspoons baking powder 1 tsp salt 50 g butter, room temperature if you have time to wait 2 ½ dl oat milk (or other milk, filet or yogurt)
Do this:
Mix the dry ingredients well. Feel free to sift the baking powder because lumps of baking powder are not good.
Mix in the butter with your hands.
Add the milk. It will be a rather sticky dough.
Divide the dough into about 6 parts
Roll out the dough on a floured board. Make them thin, otherwise there is a risk that they will not be baked all the way through.
Heat up a frying pan (medium heat). Fry the bread so that it gets a nice color on both sides and feels well-baked.
Some variations; mix in some seeds in the dough, add your favorite bread spices, fry outside over an open fire (aren’t all foods more tasty outdoors?!). I use vegan butter.
Now is the time to plan this year’s gardening. As you can read about in the post about seed ordering, I have a plan in a spreadsheet on Google Drive. In that document there is a list of what to sow, when to sow, whether to pre-cultivate inside, in a greenhouse or direct sow. I also have some lists about crop sequence, what is good to plant together and general development time to know when it is time to harden and plant out. But so far, there is not much in that list that is relevant.
Begin to sow
In January I have some seeds to plant. Some years I have planted lots in January. I have wanted an early harvest of everything but it doesn’t suit my growing style or location. The plants become far too large and rickety due to poor lighting. The entire kitchen table is flooded with pots of all sizes and I end up having to plant crops that aren’t really ready, that can’t really handle the cold out there. That’s different for everyone, but this year I will sow chili and leeks. I’m also going to try to plant some garlic because I didn’t last fall. However, it is a bit difficult to get hold of good chives at this time of year. The reason why chillies and leeks are sown is that they have a long development time. Other things that are also suitable for sowing in January are aubergine, celeriac and paprika. Of course, it is also possible to sow cabbage to pick small leaves, peas for pea shoots and other small sprouts that are good. It all depends on your time, your energy and your wishes and then the location of course! Next week I will publish a chili cultivation guide. There is all the information to get started with your chili cultivation + a quick guide for those of you who don’t like reading long instructions.
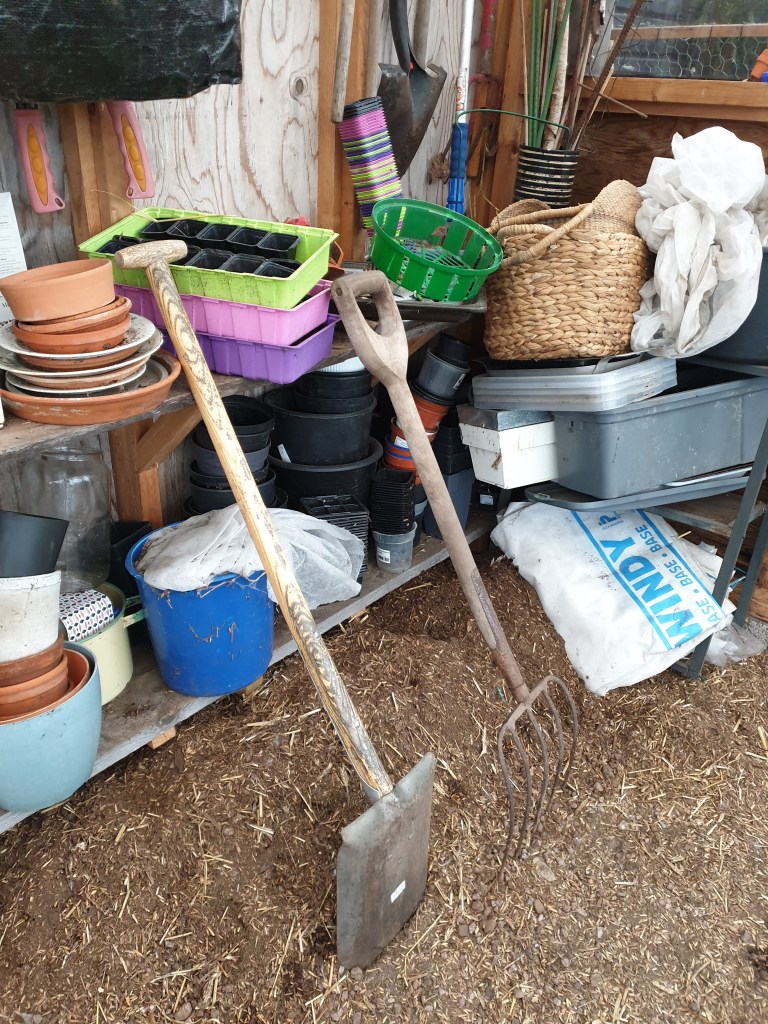
Check your gear
In January it is also a good time to check through pots and troughs and buy or order what you are missing. I reuse everything I can until it falls to pieces and I like to save on old plastic containers for food bought during the year. Important when it comes to the first seeds is that there is good drainage so that the soil can absorb water if you water from below and so water can flow out if you water from above. The small seeds are often sensitive to both drying out and flooding. For me, unfortunately, there will be a lot of plastic pots. I’ve tried cultivating in old milk cartons and in egg cartons but find that it easily molds or that the carton kind of dissolves. I hope to find some more durable material one day but for now it is as it is. I also usually start planning where to put things out in the garden to see if support sticks or netting is needed for the climbing beans, sugar snap peas and crops like that. Tools are also good to check. Right where it is, spring is here and then you don’t want to stand there without a grip or shovel and discover that there is a puncture on the wheelbarrow. It’s always busy as soon as spring comes, even if you forget it before each season.
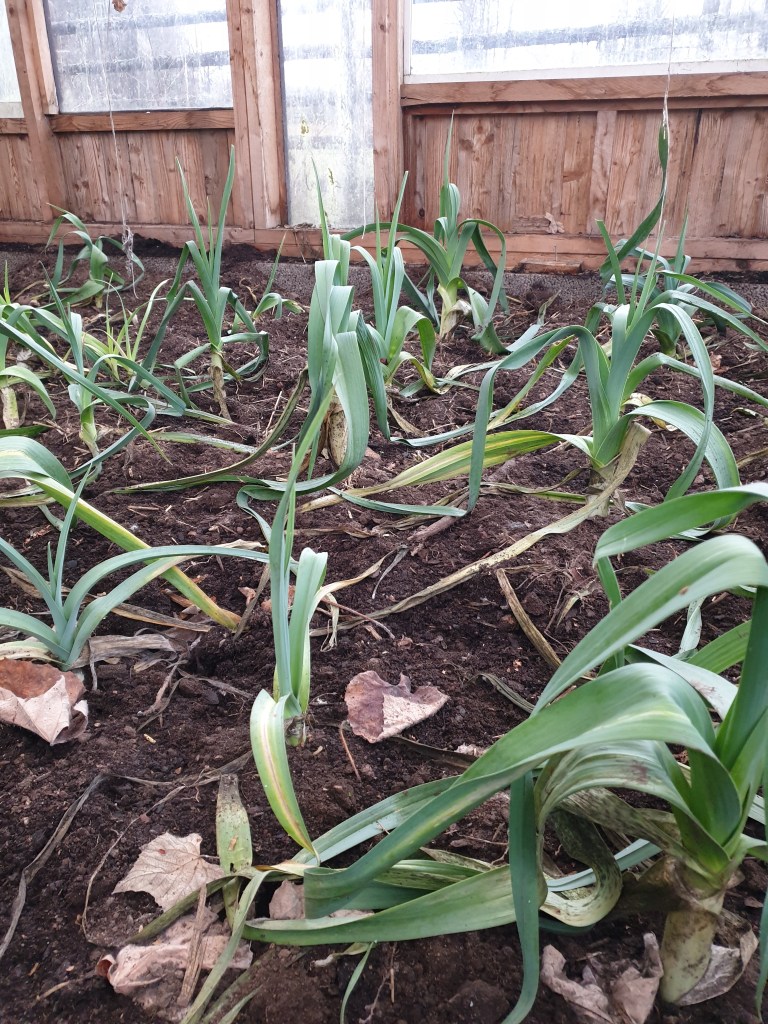
Tidy up in the garden
I don’t know about you, but my garden is pretty ugly right now. Everything is weighed down by moisture and rain, it’s muddy on the ground and the colors are fairly dull. One of the few things that is nice is that our pond is full of water and that the ground around it is slightly drier than previous years when there was a flood. Another thing is that there is a lot coming out! What is hidden in grass and snow comes out in the thaw! Those rocks I moved from the duck house but just put in a pile waiting for more time are clearly visible now, calling out to me to be moved. The shovel that I didn’t find last summer when the grass was tall is there in full view now along with my daughter’s bucket, rake, ball and shovel. Also, everything that looks perfectly fine in the summer looks pretty awful now. For example, a broken bench that stands by the chicken coop and the two compost bins that look like they were thrown out at random. So it’s a good time to clean the garden!
Sometimes you find leek when tidying up!
Enjoy the winter
I love all seasons! It’s actually true! I used to say I loved summer and hated winter because I love heat but not cold. But now I enjoy all seasons. Spring is wonderful when little flowers surprise you here and there. The birds are chirping and there is a nice tension in the air. A promise and a longing for sun, warmth and life! Summer is warm, light, no heavy clothes, just going out. Many have holidays, it grows and is created everywhere. Tasty berries and vegetables are right outside your door, ready to be picked. And then comes autumn. Harvest time! To take care of everything that we worked so hard for all year. But also to be inside, take out a warm sweater, feel the smell of damp leaves when picking mushrooms in the forest. So one day when you look out the window, it’s here, winter, it’s snowing a little, the neighbor puts up lights in the window, Christmas lights, New Year’s rockets and promises of an even better year, next year. We get to put our fingers in the soil again and feel a slight scent of anticipation, hope for a good harvest, excitement about new plants. To be honest, I’m pretty tired of gardening in November and gladly take some time off to relax. But in January, my fingers start to itch a little and I can enjoy that itch for a while. Sit and dream in front of the fire with a cup of something hot to drink, it’s cold and windy outside, but I don’t have to go out, not now, now I can enjoy inside and tomorrow when it’s a beautiful winter sun, then I can go out in the greenhouse, get out some troughs and some soil and plant my very first seeds for this year. Beautiful, hot, red chilis!
The dawn of a new year always brings anticipation, hope, and plans for the months ahead. This 2023, I’ve decided to gaze into the proverbial crystal ball and lay down a roadmap for our garden – one that meets the unique challenges this year brings.
Aref and I will be ushering in some significant changes in our lives, with him working abroad intermittently. The implications? Our beloved garden will need to evolve into a more self-reliant space. While the very thought is exhilarating, it also unfurls a carpet of concerns – dehydration and those relentless weeds topping the list. But as every gardener knows, for every problem, there’s always a solution, or in our case, multiple!
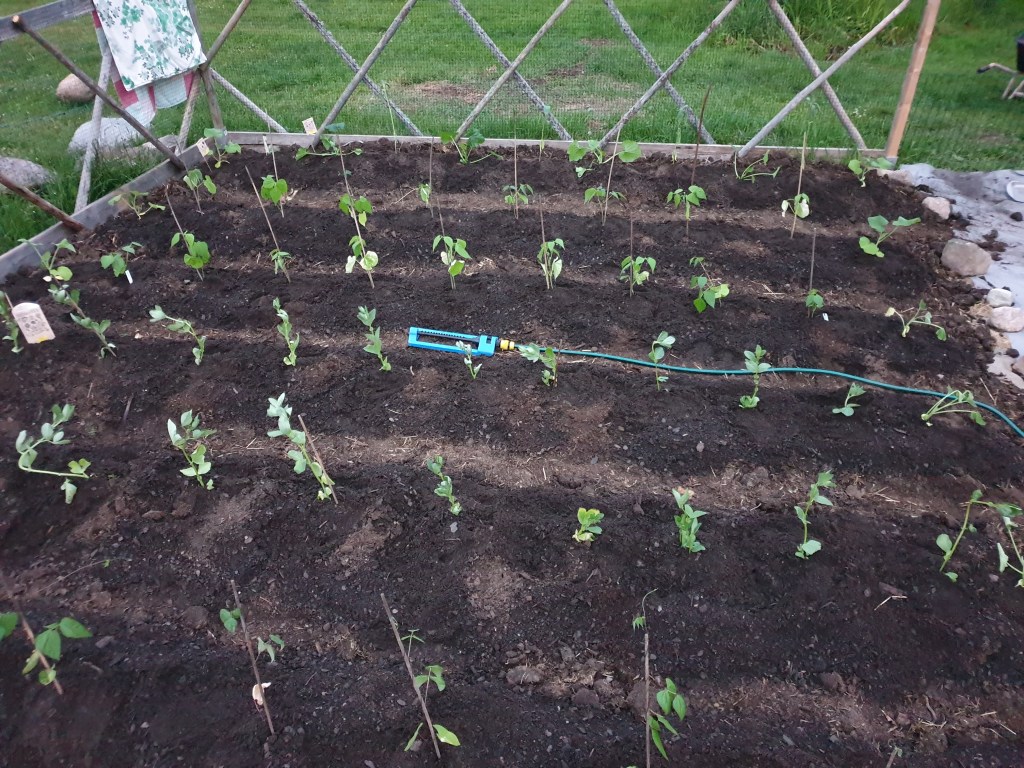
1. Embracing Cover Cropping: For those unfamiliar, think of this as a protective blanket for the soil. By using grass clippings to envelop the ground around our plants, we intend to retain moisture and deter those pesky weeds. It’s an age-old method with promising results.
2. The Magic of Interplanting: Nature thrives in unity. We plan to adopt the technique of growing crops side-by-side, especially those that complement each other. Imagine zucchinis nestling with corn, or butternut squash playing companion to beans. This symbiosis not only keeps the weeds at bay but also ensures the soil remains shielded from the harsh sun.
3. Automating Hydration: Our greenhouse poses a unique challenge. With no rainfall seeping in, we must be extra vigilant. While some of our deep-rooted plants, like grapes, have the luxury to draw water from the outer edges due to the lack of flooring, others aren’t so fortunate. We’re still brainstorming the perfect automatic watering system, but trust that we’ll land on a solution soon.
4. Going Pot-less: To mitigate dehydration risks, we’re bidding adieu to pots this year. Direct ground planting will be our modus operandi, ensuring the roots have consistent access to moisture.
5. The Power of Pre-cultivation: While it’s ambitious to pre-cultivate everything, we’ll aim high! Giving our seeds a head start indoors should, in theory, give them an edge over the weeds.
Despite our best-laid plans, nature, with its inherent unpredictability, will throw its curveballs. We anticipate a few casualties to pests, dehydration, or the fierce competition of weeds. However, the silver lining remains – many plants will not just survive, but thrive. And I hold onto the conviction that our garden will grace our plates generously this year as well.
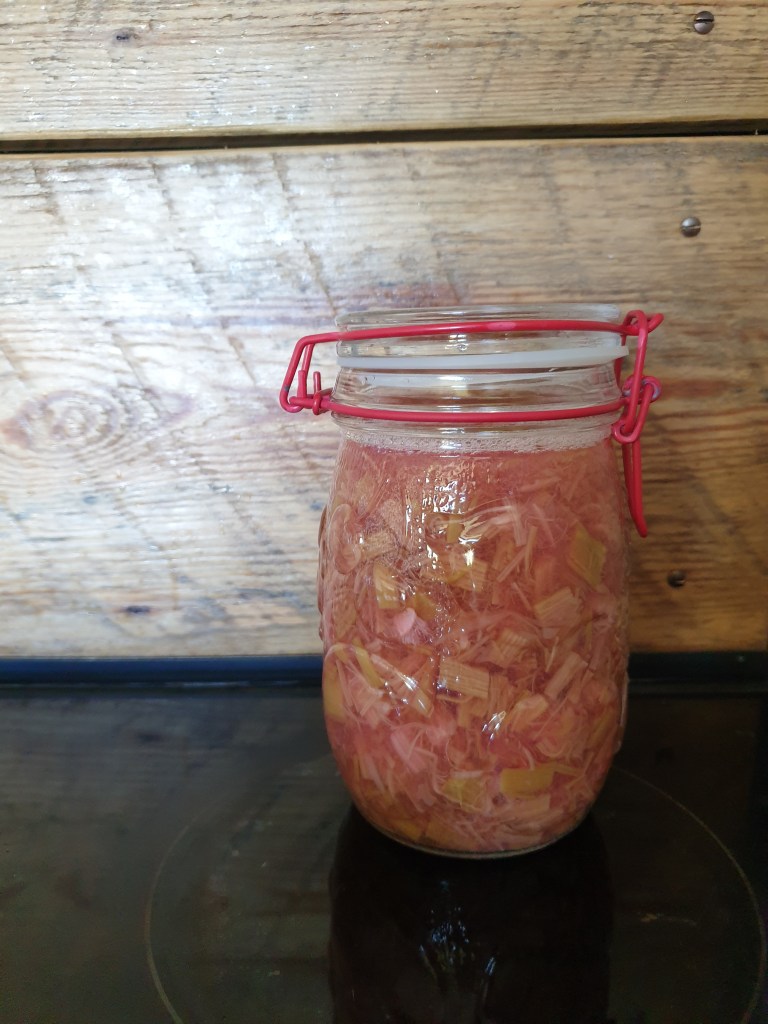
The rhubarb season has begun! Yeay! It really is one of our favorites. My dad always made rhubarb jam when we were little, as soon as it was possible to harvest.
Here’s how we do it: Harvest as much rhubarb as you can carry, or at least as much as the plant allows. Rinse and cut into pieces. Some peel rhubarb but I usually don’t, do what suits you! Boil the rhubarb pieces until they are soft and add sugar to your taste. Done!
It’s so simple and so good! We usually eat it as it is or have it in “fil” (google translate says sour milk but I don’t know if that’s the correct translation..), yogurt or porridge.